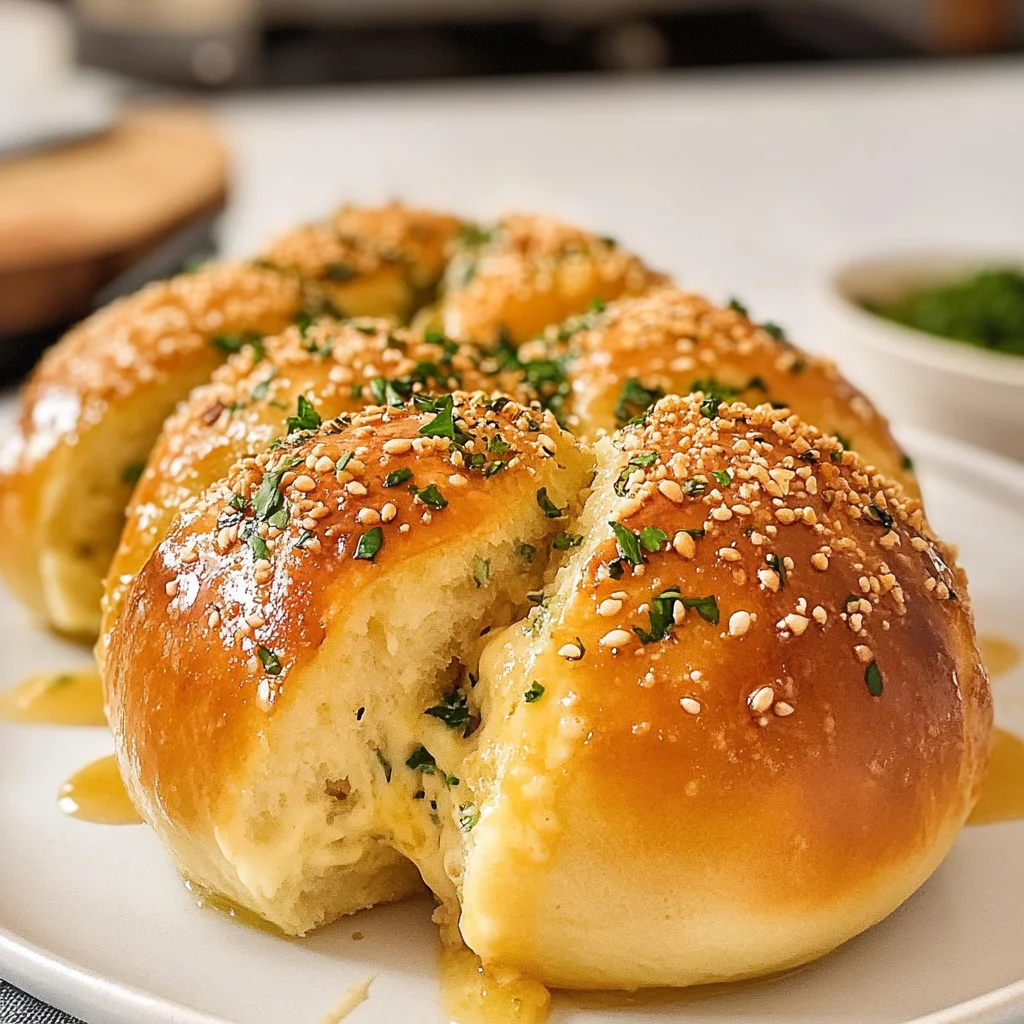
The dough’s rising, and I can’t wait to dig in. Korean Cream Cheese Garlic Buns are the answer to my craving for something warm and satisfying, without a ton of fuss.
These are perfect for nights when you need a quick fix and your fridge is running low. Instead of using heavy fillings or complicated techniques, we’re keeping it simple with cream cheese and green onions (trust me, it’s a winning combo). Plus, they bake up in just 25 minutes! You’ll be glad you made these. Warm buns await!
Why You’ll Love This Korean Cream Cheese Garlic Buns
- Super Easy: It comes together quickly, and the dough’s forgiving, so even if you mess up a bit, it’ll still be good.
- Flavor Explosion: The creamy filling mixed with garlic and green onions gives each bite a tasty punch you won’t forget.
- Crisp-Tender Texture: When baked just right, it’s got this perfect balance of golden edges and soft insides that makes it totally satisfying.
- Versatile Snack: Perfect for breakfast, lunch, or dinner (or just whenever). You can even stuff them with leftovers if you’re feeling adventurous!
- Surprising Benefit: It’s great for meal prep — make a batch ahead of time and freeze them. Just pop them in the oven when you’re ready to eat!
Korean Cream Cheese Garlic Buns Ingredients
For the Dough:
all-purpose flour (4 cups) — Use unbleached all-purpose flour for better texture, or they’ll end up dense.
milk (1 cup) — Go for whole milk, not skim; it adds richness or you’ll miss that creamy taste.
sugar (1/2 cup) — Use granulated sugar, not brown, for the right sweetness, or it’ll throw off the flavor.
active dry yeast (1 packet) — Get a good brand like Red Star; don’t use instant yeast, or they won’t rise properly.
unsalted butter (1/2 cup) — Always use unsalted butter; don’t sub with margarine, or the flavor’ll suffer.
eggs (2 large) — Use large eggs; don’t swap for medium, or your dough won’t bind correctly.
salt (1 teaspoon) — Use fine sea salt, not table salt; otherwise, they’ll be too salty.
For the Cream Cheese Filling:
cream cheese (8 ounces) — Philadelphia cream cheese is the best; don’t use low-fat, or it won’t melt right.
green onions (1/4 cup) — Fresh green onions are a must; don’t use dried, or they’ll lack that sharp bite.
garlic powder (1 teaspoon) — Use garlic powder for convenience, but fresh garlic brings way more flavor—pick one.
salt (1/2 teaspoon) — Always use fresh garlic, not jarred—otherwise, the taste won’t pop.
For the Garlic Butter Topping:
unsalted butter (1/2 cup) — Fresh parsley’s a must for garnish; don’t skip it, or it’ll look bland.
garlic (4 cloves)
parsley (1 tablespoon)
Full measurements in the recipe card below.
How to Make Korean Cream Cheese Garlic Buns
1. Activate Yeast: In a large bowl, combine warm milk, sugar, and yeast. Let it sit for about 10 minutes until frothy (that means it’s alive!).
2. Make the Dough: Now, add melted butter, eggs, and salt to the yeast mixture. Mix well before gradually adding flour until a dough forms. Knead for about 5-7 minutes until it’s smooth and elastic.
3. First Rise: Place the dough in a greased bowl, cover with a cloth, and let it rise in a warm place for about 1 hour or until doubled in size (you’ll know it’s ready when it feels puffy).
4. Prepare Filling: In a medium bowl, mix softened cream cheese, green onions, garlic powder, and salt until well combined. Set aside — this is gonna be tasty!
5. Shape Buns: After the dough’s risen, punch it down and divide into 12 equal pieces. Flatten each piece and place a spoonful of that cream cheese filling in the center. Pinch the dough to seal them up tight.
6. Second Rise: Shape into buns and place on a baking sheet lined with parchment paper. Cover with a cloth again and let them rise for another 30 minutes (don’t rush this part — if you do, they won’t puff up nicely).
7. Bake & Butter: Preheat your oven to 350°F (175°C). Bake the buns for 20-25 minutes or until golden brown (they should sound hollow when tapped). Brush with melted garlic butter as soon as they come out.
Exact quantities in the recipe card below.
How to Store Korean Cream Cheese Garlic Buns
- Room Temperature: Keep them in an airtight container for up to 2 days. (Just remember, they might get a little soggy if you don’t eat them fast enough.)
- Refrigerator: Store in a tightly sealed container for about 4-5 days. (But honestly, the texture won’t be as good — the buns might get a bit dense.)
- Freezer: Wrap each bun tightly in plastic wrap and then pop them into a freezer bag. They’ll last for about 2 months. (Just make sure to squeeze out as much air as possible!)
- Reheating: To warm them up, pop them in the oven at 350°F for about 10 minutes until they’re hot and the edges are just starting to crisp again. (You’ll know they’re ready when you can smell that garlicky goodness wafting through your kitchen!)
What to Serve with Korean Cream Cheese Garlic Buns?
These buns are rich and creamy, so having something light and tangy on the side keeps everything balanced. Here are some tasty pairings you might want to try:
- Pickled Vegetables: The acidity cuts through the richness, adding a refreshing crunch. Just a quick pickle in vinegar does the trick.
- Simple Salad: A crisp green salad with a lemon vinaigrette offers a nice contrast in both temperature and flavor. Toss in some cherry tomatoes for color.
- Spicy Kimchi: The heat from kimchi adds an exciting kick that balances the creaminess of it. Plus, it’s super easy to grab from your fridge.
- Fruit Salsa: Fresh fruit salsa with mango or pineapple provides sweetness that brightens each bite. Chop up your favorite fruits, and it’s ready in minutes!
- Cold Cucumber Soup: This chilled soup gives you a lovely temperature contrast while being light and refreshing. Blend cucumbers with yogurt for a quick prep!
- Grilled Asparagus: Try some grilled asparagus drizzled with balsamic glaze. The charred flavor complements the cream cheese filling perfectly.
- Herbed Yogurt Dip: Mix plain yogurt with fresh herbs for a tangy dip that contrasts nicely with this dish’s richness. Just 5 minutes of mixing!
- Tomato Bruschetta: Topped with fresh basil, this adds a crunchy texture and vibrant color to your meal, balancing everything out beautifully.
Korean Cream Cheese Garlic Buns Variations
Here’s how to play with this recipe and make it your own!
- Herbed Cream Cheese: Mix in 1 tablespoon of fresh chopped herbs like dill or basil into the filling for extra flavor.
- Spicy Kick: Add 1 teaspoon of red pepper flakes to the cream cheese mixture for a zesty surprise.
- Cheesy Twist: Fold in 1/2 cup of shredded mozzarella with the cream cheese for a melty-gooey center.
- Garlic Lover’s Dream: Stir in 2 cloves of minced garlic with the other ingredients for an intense garlic flavor.
- Sweet Variation: Replace half the sugar in the dough with honey for a sticky-sweet twist.
- Nutty Delight: Sprinkle toasted sesame seeds on top before baking for a crunchy finish and nutty taste.
- Next Level Upgrade: Brush with melted butter mixed with 1 teaspoon of soy sauce right before serving for an umami boost.
Make Ahead Options for Korean Cream Cheese Garlic Buns
I like to prep the dough for Korean Cream Cheese Garlic Buns a day ahead. Just follow the first rise, then punch it down and wrap it tightly in plastic wrap or pop it in an airtight container. It’ll hold well in the fridge for up to 24 hours. The filling can also be made ahead and stored in the fridge, but I wouldn’t recommend making the buns too early—once they’re baked, they’re best fresh. Right before serving, just let them rise again, bake, and brush that garlic butter on top. Trust me, you’ll want these warm and gooey! Bake them fresh for the best results.
Korean Cream Cheese Garlic Buns Recipe FAQs
Can I make Korean Cream Cheese Garlic Buns ahead of time?
Absolutely! You can prepare the dough and filling in advance. Just let the dough rise, then punch it down and shape your buns. Place them on the baking sheet, cover tightly with plastic wrap, and refrigerate overnight. When you’re ready to bake, let them come to room temperature for about 30 minutes before the second rise. (Trust me, they’ll still puff up beautifully!) Just keep an eye on your rising time.
Why did my Korean Cream Cheese Garlic Buns turn out dense?
Density usually means something went wrong with the yeast or the flour. If your yeast didn’t foam up after mixing it with warm milk and sugar, it’s dead — toss it out. Also, using bleached all-purpose flour can lead to a heavier texture; stick with unbleached for lightness. Remember to knead until smooth and elastic too! A good visual cue is when it springs back when poked.
What can I substitute for cream cheese in this dish?
If you need a substitute, mascarpone works well since it’s creamy and has a similar texture. However, it won’t have that distinct tangy flavor cream cheese gives. You could also try ricotta mixed with a bit of sour cream for that creamy consistency — just drain it well first! But don’t go low-fat here; you want that rich taste in every bun.
Can I use fresh garlic instead of garlic powder in this recipe?
For sure! Fresh garlic packs more flavor but be careful not to overdo it; about 2-3 cloves minced should do the trick instead of one teaspoon of powder. The smell will be fantastic as it cooks! Just remember that fresh garlic may not distribute evenly like powder does, so mix well into your filling for that tasty punch.
Final Thoughts on Korean Cream Cheese Garlic Buns
These Korean Cream Cheese Garlic Buns are worth making for that incredible flavor payoff — trust me, the combo of creamy filling and garlic butter is a total winner. If you’ve been on the fence about trying this recipe, just do it! You’ll be glad you took the plunge. Seriously, these buns are going to become a go-to when you need something warm and satisfying. Let me know how yours turned out in the comments!
Korean Cream Cheese Garlic Buns
Ingredients
Method
- In a large bowl, combine warm milk, sugar, and yeast. Let it sit for about 10 minutes until frothy.
- Add melted butter, eggs, and salt to the yeast mixture. Mix well.
- Gradually add flour, mixing until a dough forms. Knead for about 5-7 minutes until smooth.
- Place the dough in a greased bowl, cover with a cloth, and let it rise in a warm place for about 1 hour or until doubled in size.
- In a medium bowl, mix softened cream cheese, green onions, garlic powder, and salt until well combined.
- After the dough has risen, punch it down and divide it into 12 equal pieces.
- Flatten each piece and place a spoonful of the cream cheese filling in the center. Pinch the dough to seal.
- Shape into a bun and place on a baking sheet lined with parchment paper.
- Cover the buns with a cloth and let them rise for another 30 minutes.
- Preheat the oven to 350°F (175°C).
- Bake the buns for 20-25 minutes or until golden brown.
- While the buns are baking, melt butter in a small saucepan over medium heat.
- Add minced garlic and parsley, stirring until fragrant. Remove from heat.
- Once the buns are out of the oven, brush the garlic butter topping generously over the warm buns.
- Serve immediately and enjoy!