
The oven’s already buzzing, and I can’t wait to dig into these Cheesecake Lemon Bars. A quick mix, a little baking, and you’ve got a tangy-sweet treat that feels fancy without the fuss.
These bars are perfect for those nights when you need dessert but forgot to plan ahead (we’ve all been there). Unlike other lemon desserts that take forever to set, this one comes together in about an hour. You’ll be slicing into chilled, creamy goodness in no time. Trust me on this: they’re worth it!
Why You’ll Love This Cheesecake Lemon Bars
- Super Simple: You can whip this up in no time; just a few bowls and you’re good to go!
- Bright Flavor: The zesty lemon gives it a refreshing kick that balances out the creamy cheesecake layer perfectly.
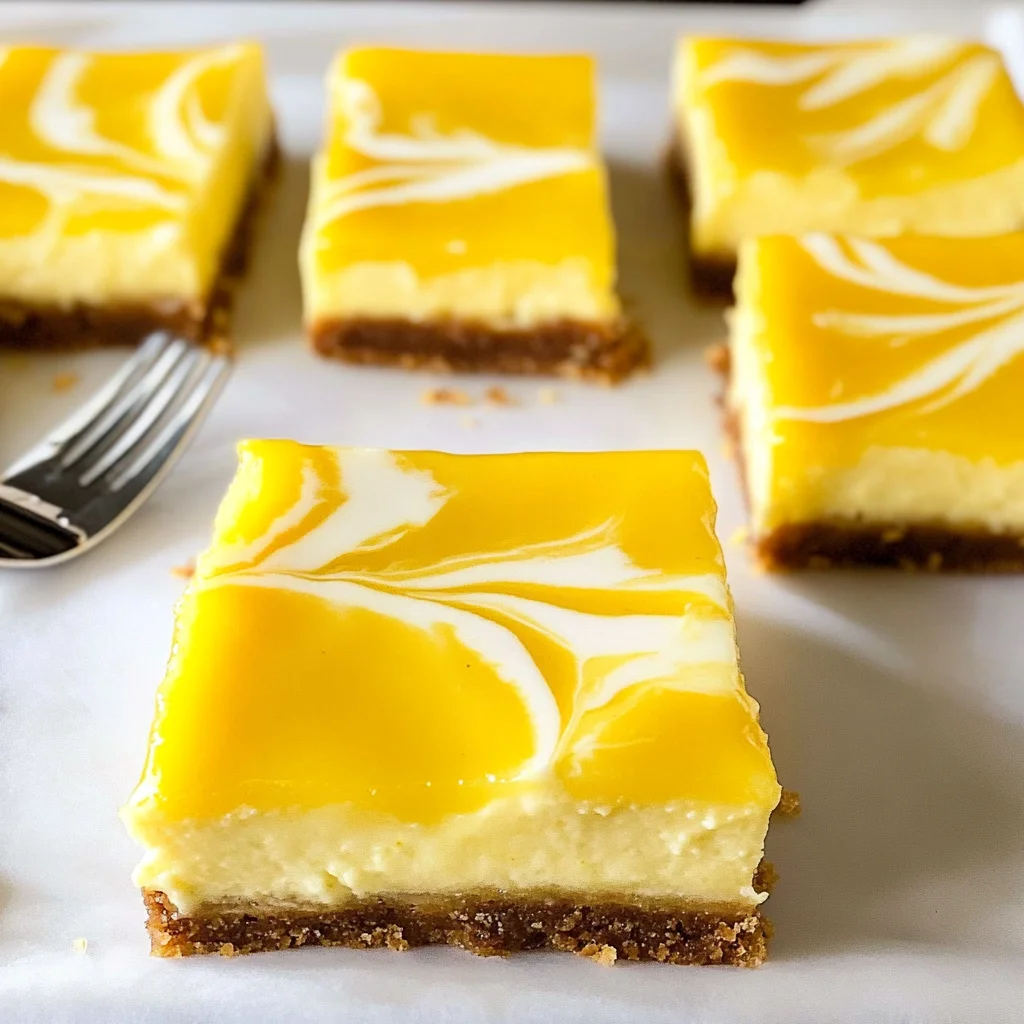
- Crisp-Tender Base: The buttery, crumbly crust provides a delightful contrast to the smooth, creamy filling on top.
- Versatile Treat: Great for parties or just a cozy night in; everyone loves it (even if it doesn’t last long).
- Chill Time Needed: It needs at least 2 hours in the fridge before slicing, so plan ahead — but totally worth the wait!
Cheesecake Lemon Bars Ingredients
For the Base:
all-purpose flour (1 cup) — Use King Arthur Flour for consistent results, or your bars might crumble apart.
unsalted butter (1/2 cup) — Don’t skimp on unsalted butter; margarine just won’t give you that rich flavor.
granulated sugar (1/4 cup) — Use superfine sugar for a smoother texture, or you’ll end up with gritty bars.
salt (1/4 teaspoon) — Always add a pinch of salt; without it, your cheesecake won’t pop with flavor.
For the Cheesecake Layer:
cream cheese (8 ounces) — Get full-fat cream cheese, no low-fat substitutes, or your bars’ll taste bland.
granulated sugar (1/2 cup) — Room temp eggs mix in better; cold ones can lead to a lumpy batter.
egg (1 large) — Always use pure vanilla extract, not imitation, or your bars’ll taste like cardboard.
vanilla extract (1 tablespoon) — Fresh lemon juice is a must; bottled stuff lacks that bright zing.
For the Lemon Topping:
fresh lemon juice (1/2 cup) — Zest those lemons right before juicing; otherwise, it’ll dry out and lose flavor.
lemon zest (1 tablespoon) — Use large eggs for consistency; smaller ones can throw off your ratios.
eggs (2 large)
granulated sugar (1/2 cup)
all-purpose flour (1/4 cup)
Full measurements in the recipe card below.
How to Make Cheesecake Lemon Bars
1. Preheat the Oven: Set your oven to 350°F (175°C). This ensures your bars bake evenly right from the start.
2. Make the Base: In a medium bowl, mix together flour, melted butter, sugar, and salt until it’s well combined. Press this mixture firmly into the bottom of a greased 9×9 inch baking dish.
3. Bake the Base: Bake for 15 minutes, until it’s lightly golden around the edges. Let it cool slightly while you prepare the cheesecake layer.
4. Prepare Cheesecake Layer: In a large bowl, beat together cream cheese and sugar until smooth and creamy. Add in the egg and vanilla extract, mixing until fully combined (don’t rush this part or you’ll get lumps).
5. Spread Cheesecake Mixture: Pour this creamy goodness over your cooled base, spreading it out evenly. Bake for an additional 15 minutes; it’ll puff up a bit when it’s ready.
6. Make Lemon Topping: Now, whisk together in another bowl — combine fresh lemon juice, lemon zest, two more eggs, some sugar, and flour until smooth like silk (if you skip zesting fresh lemons, you’ll miss that zing!).
7. Final Bake for Cheesecake Lemon Bars: Pour this lemony mixture over the baked cheesecake layer and return to the oven for another 15 minutes or until set (it’ll look just slightly jiggly in the center).
Exact quantities in the recipe card below.
How to Store Cheesecake Lemon Bars
- Room Temperature: These bars can sit out for up to 2 hours. Just cover them with plastic wrap or a clean kitchen towel to keep the top from drying out.
- Refrigerator: Pop them in an airtight container and they’ll last about a week. Just know that the crust might get a bit softer over time (not ideal, but still tasty).
- Freezer: For longer storage, freeze them in an airtight container or wrapped tightly in plastic wrap. They’ll hold up for about 2 months. Thaw in the fridge overnight before digging in.
- Reheating: If you want to enjoy them warm, heat in the oven at 300°F until they’re just warmed through (you’ll see the edges start to glisten). Don’t microwave — that makes them too gooey!
What to Serve with Cheesecake Lemon Bars?
It’s bright and creamy, but serving something with a little acidity or crunch keeps it from feeling too rich.
- Fresh Berries: Their tartness balances the sweetness perfectly and adds a nice texture contrast. Try strawberries or raspberries for color.
- Lemon Sorbet: A scoop of this icy treat brings a refreshing coldness that cuts through the richness. It’s super easy to find.
- Greek Yogurt: A dollop on the side gives a creamy texture that’s tangy enough to brighten every bite. Use plain, unsweetened for best results.
- Mint Tea: The herbal notes provide a lovely temperature contrast while aiding digestion after the sweetness. Brew it fresh for maximum flavor.
- Chilled Sparkling Water: A splash of lemon in sparkling water is refreshing and lightens up this dish beautifully. Serve it ice-cold alongside.
- Shortbread Cookies: Their crumbly texture adds a fun crunch that complements the smooth cheesecake layer. Just bake a batch while your bars chill!
- Grilled Peaches: Sweet and slightly smoky, they add warmth and a juicy texture. Grill them quickly before serving for best results.
- Coconut Whipped Cream: Light, fluffy, and slightly sweet, it softens the richness while adding creaminess — just whip some coconut cream until fluffy!
Cheesecake Lemon Bars Variations
Here’s how to play with this recipe and make it your own!
- Graham Cracker Base: Swap out the flour for 1 cup of crushed graham crackers for a classic cheesecake crust.
- Berry Swirl: Add 1 cup of fresh or frozen berries to the cheesecake layer before baking for a fruity twist.
- Lemon Poppy Seed Upgrade: Mix in 2 tablespoons of poppy seeds into the lemon topping for a fun crunch.
- Vanilla Bean Infusion: Use the seeds from 1 vanilla bean instead of extract for a richer flavor.
- Gluten-Free Option: Substitute all-purpose flour with 1 cup of gluten-free flour blend in the base.
- Coconut Cream Layer: Replace half of the cream cheese with 4 ounces of coconut cream for a tropical vibe.
- Extra Zesty Touch: Increase lemon zest to 2 tablespoons in the topping for a punchier citrus flavor.
Make Ahead Options for Cheesecake Lemon Bars
I love prepping the base and cheesecake layers ahead of time. You can make those a day or two in advance and store them in an airtight container in the fridge. Just keep the lemon topping separate, because it doesn’t hold up as well — it’s best to mix that right before serving. After you pour it over the cheesecake layer, bake it fresh so those flavors pop. I usually wrap mine in plastic wrap if I’m stacking layers or use a glass dish with a lid. Trust me, these Cheesecake Lemon Bars are even better chilled after some time in the fridge. Just don’t skip chilling!
Cheesecake Lemon Bars Recipe FAQs
Can I make Cheesecake Lemon Bars ahead of time?
Absolutely! These bars are great for making in advance. Just prepare them, let them cool, and then pop them in the fridge for at least 2 hours before serving. They actually taste better after sitting overnight, as the flavors meld together beautifully. Just remember to slice them cold for cleaner cuts (trust me on this — warm bars can be a gooey mess).
What can I substitute for cream cheese in this recipe?
I wouldn’t recommend substituting cream cheese if you want that rich flavor and texture; it’s pretty essential here. But if you must, try mascarpone or a thick Greek yogurt. Just know that the flavor will be different, and you might lose some of that cheesecake richness. Stick to full-fat options to keep it creamy!
Why did my Cheesecake Lemon Bars turn out gritty?
That gritty texture usually comes from using regular granulated sugar instead of superfine sugar. If your sugar doesn’t dissolve completely while mixing, you’re gonna end up with some unpleasant bites. Make sure to beat the cream cheese and sugar until it’s smooth — it should feel creamy and velvety when you’re done. And always add that pinch of salt; it really helps everything pop.
How do I know when this dish is done baking?
When the lemon topping is set but still slightly jiggly in the center, you’re good to go! It’ll look firm around the edges but have a little movement in the middle when you give the pan a gentle shake (that’s your cue). Also, don’t forget to let them cool at room temperature before chilling; patience pays off with these delicious bars!
Final Thoughts on Cheesecake Lemon Bars
These Cheesecake Lemon Bars are totally worth making for that bright, zingy flavor from the fresh lemon juice and zest. Seriously, when you get that right, it transforms everything. If you’ve been on the fence about trying this, just go for it! Once you taste that sticky-sweet cheesecake layer paired with the tart lemon topping, you’ll want to whip these up again and again. Let me know how yours turned out in the comments!
Cheesecake Lemon Bars
Ingredients
Method
- Preheat the oven to 350°F (175°C).
- In a medium bowl, mix together the flour, melted butter, sugar, and salt until combined.
- Press the mixture into the bottom of a greased 9x9 inch baking dish.
- Bake for 15 minutes, then remove from the oven and set aside to cool slightly.
- In a large bowl, beat the softened cream cheese and sugar until smooth.
- Add the egg and vanilla extract, mixing until fully combined.
- Pour the cheesecake mixture over the cooled base and spread evenly.
- Bake for an additional 15 minutes.
- In a separate bowl, whisk together the lemon juice, lemon zest, eggs, sugar, and flour until smooth.
- Pour the lemon mixture over the baked cheesecake layer.
- Return to the oven and bake for another 15 minutes until set.
- Remove from the oven and allow to cool at room temperature for 30 minutes.
- Refrigerate for at least 2 hours before slicing into bars.
- Serve chilled, optionally dusted with powdered sugar.


