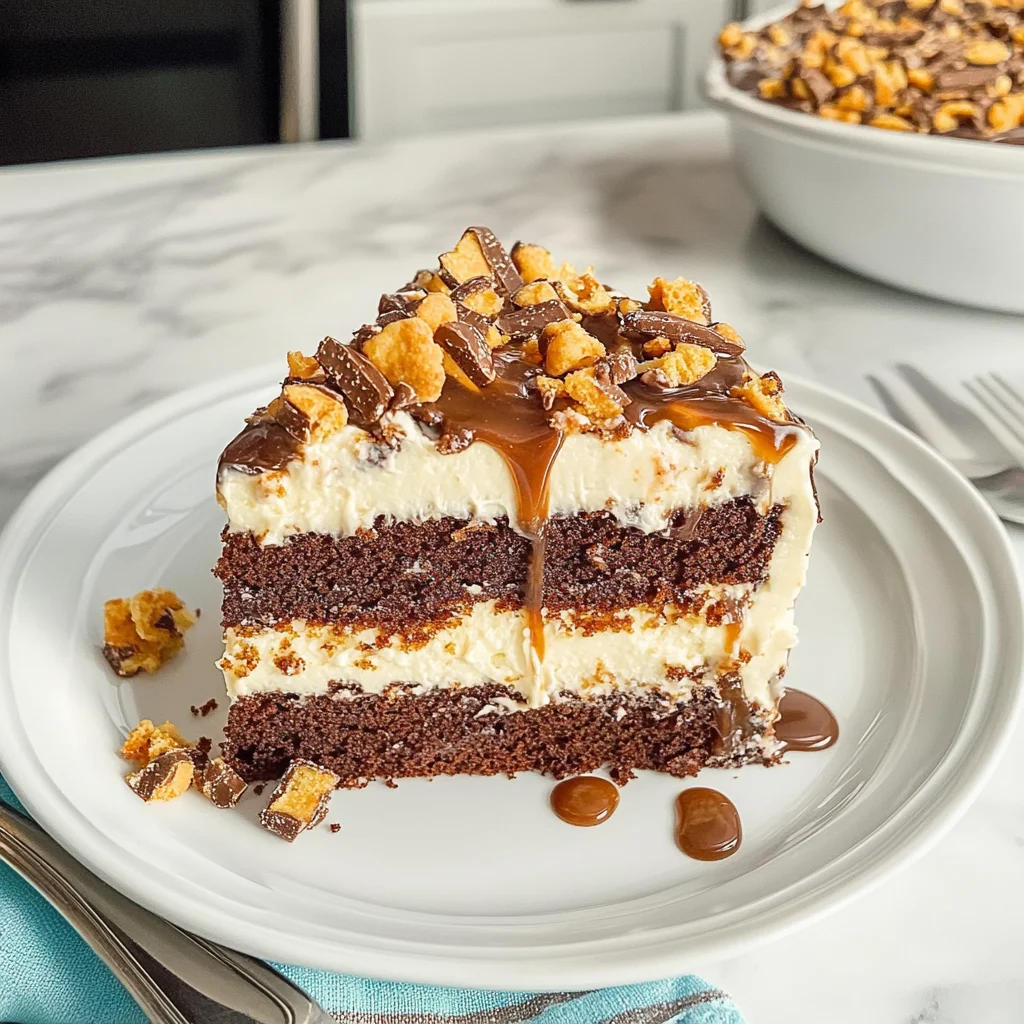
Oven’s humming, and I can smell chocolate. The cake’s already baking away, and my kids are circling like hawks waiting for a taste of Butterfinger Cake. Honestly, it’s one of those desserts that disappears before you can even grab a slice.
This is perfect for nights when you’ve got zero plan but need to whip up something sweet. You don’t have to fuss with layers or fancy techniques here. Plus, the peanut butter frosting really takes it up a notch (trust me on this). Just mix, bake, and frost. Let’s get started!
Why You’ll Love This Butterfinger Cake
- Super easy prep: Just mix, bake, and frost — it comes together quicker than you’d think (trust me).
- Chocolate-peanut butter combo: The rich, melty-gooey frosting paired with the chocolate cake is a total dream.
- Great for sharing: Slice it up for parties or potlucks; everyone will want a piece (and they won’t stop talking about it).
- Texture jackpot: You’ll get that soft, tender cake with a creamy topping and crunchy candy bits on top.
- Watch your portions: It’s super tempting to keep going back for more; try not to overindulge (I know it’s hard).
Butterfinger Cake Ingredients
For the Base:
all-purpose flour (1.5 cups) — Sift the flour or it’ll clump and ruin your cake’s texture.
granulated sugar (1 cup) — Use granulated sugar, ’cause brown sugar’s too moist and alters the cake.
unsweetened cocoa powder (1 cup) — Go with Dutch-processed cocoa for richer flavor, or it won’t taste as good.
baking powder (1 teaspoon) — Don’t skip the baking powder; it’s crucial for that cake to rise properly.
baking soda (1 teaspoon) — Use baking soda, not baking powder, or your cake’ll taste bitter.
salt (1/2 teaspoon) — Don’t omit the salt; it enhances all the flavors and balances the sweetness.
eggs (2 large) — Use large eggs; medium ones won’t provide enough moisture or structure.
milk (1 cup) — Whole milk’s best—don’t trade it for skim, or your cake’ll be dry.
vegetable oil (1/2 cup) — Vegetable oil keeps it moist; don’t use olive oil, or it’ll taste weird.
vanilla extract (2 teaspoons) — Pure vanilla extract’s a must—don’t cheap out with imitation; it shows.
For the Frosting:
creamy peanut butter (1 cup) — Creamy peanut butter’s key for that smooth texture; don’t try crunchy here.
unsalted butter (1/2 cup) — Stick with unsalted butter for better control of the saltiness—don’t swap it.
powdered sugar (2 cups) — Powdered sugar’s non-negotiable for that smooth frosting or it’ll be grainy.
heavy cream (1/4 cup) — Use heavy cream for a rich frosting; low-fat won’t whip up properly.
For the Topping:
Butterfinger candy bars (4 fun size) — Chop Butterfinger bars finely or they won’t distribute evenly in the cake.
Full measurements in the recipe card below.
How to Make Butterfinger Cake
1. Preheat Oven: Preheat your oven to 350°F (175°C). Grease and flour a 9×13 inch baking pan, so the cake doesn’t stick later.
2. Mix Dry Ingredients: In a large mixing bowl, combine all-purpose flour, granulated sugar, unsweetened cocoa powder, baking powder, baking soda, and salt. Stir well until it’s all blended together nicely.
3. Add Wet Ingredients: Now, add the eggs, milk, vegetable oil, and vanilla extract to the dry mix. Mix until everything’s well combined; you want a smooth batter without lumps (it should look thick and silky).
4. Pour Batter: Pour the batter into your prepared baking pan and smooth out the top with a spatula. Bake in that preheated oven for about 30 minutes, or until a toothpick comes out clean from the center.
5. Make Frosting: While the cake’s baking, beat together the creamy peanut butter and unsalted butter in a medium bowl until smooth. Gradually add in the powdered sugar and then pour in the heavy cream; mix until it’s light and fluffy.
6. Frost Cake: Once your cake has completely cooled (don’t rush this part; if it’s too warm, your frosting will melt), spread that creamy peanut butter frosting evenly over the top of your Butterfinger Cake.
7. Add Topping: Finally, sprinkle chopped Butterfinger candy bars over that delicious frosting for extra crunch and flavor!
Exact quantities in the recipe card below.
How to Store Butterfinger Cake
- Room Temperature: Keep it covered with plastic wrap or in an airtight container for up to 2 days. (But honestly, it’s best fresh, so try not to let it hang around too long!)
- Refrigerator: Store in a covered container for up to a week. The crispy topping softens a bit, but it still tastes great.
- Freezer: Wrap individual slices tightly in plastic wrap and then foil. It’ll last about 3 months. (Just know the texture might change a little after thawing.)
- Reheating: Heat slices in the microwave for about 10-15 seconds until warm. You’ll want to see some slight melting of the frosting — that’s when you know it’s ready!
What to Serve with Butterfinger Cake?
It’s rich and sweet enough to stand on its own, but a few sides can balance it out nicely. Here are some ideas:
- Vanilla Ice Cream: The cold, creamy scoop provides a temperature contrast that makes each bite feel lighter.
- Fresh Berries: Their tartness cuts through the sweetness, adding a refreshing twist without overpowering it.
- Whipped Cream: Light and airy, this adds a fluffy texture that complements the cake’s density perfectly. Plus, it’s super quick to whip up!
- Coffee: A hot cup balances the sweetness and offers a nice flavor contrast (a perfect excuse for a coffee break).
- Chocolate Sauce Drizzle: Skip plain syrup and drizzle chocolate sauce for an extra melty-gooey experience; it elevates the cake beautifully!
- Mint Leaves: A few fresh mint leaves on top add color contrast and a hint of freshness — just chop some before serving!
- Coconut Flakes: Toasted coconut brings in crunch and nutty flavor; just toss some in a pan for about 5 minutes until golden.
- Caramel Sauce: Its richness pairs with the cake’s flavors while providing sticky-sweet goodness that’s hard to resist.
Butterfinger Cake Variations
Here’s how to play with this recipe and make it your own!
- Chocolate Chip Butterfinger Cake: Fold in 1 cup of semi-sweet chocolate chips with the wet ingredients for extra melty goodness.
- Minty Fresh Twist: Add 1 tsp peppermint extract to the wet mix for a refreshing mint flavor that pairs well with chocolate.
- Nutty Crunch: Stir in 1/2 cup chopped nuts (like pecans or walnuts) with the dry ingredients for a crunchy texture.
- Coffee Boost: Replace 1/4 cup of milk with brewed coffee for a mocha-inspired flavor that’s super cozy.
- Peanut Butter Swirl: Before baking, drop spoonfuls of peanut butter into the batter and swirl gently for pockets of creamy goodness.
- Caramel Drizzle Upgrade: Drizzle warm caramel sauce over the frosting before adding crushed Butterfinger bars for a sticky-sweet finish.
- Gluten-Free Option: Substitute all-purpose flour with a gluten-free blend, using the same amount, to make it friendly for everyone!
Make Ahead Options for Butterfinger Cake
I like to prep the base of the Butterfinger Cake a day in advance. Just bake it, let it cool completely, and then wrap it tightly in plastic wrap or store it in an airtight container. It holds well for about 2 days on the counter. The peanut butter frosting, though, should be made fresh—if you make that ahead, it can get a bit too thick and hard to spread later (trust me on this). Right before serving, just whip up the frosting, spread it over the cooled cake, and top with crushed Butterfinger candy bars. Keep it simple and enjoy!
Butterfinger Cake Recipe FAQs
Can I make Butterfinger Cake ahead of time?
Absolutely! This dish actually tastes even better the next day. Just bake the cake and let it cool completely before frosting it. Once frosted, cover it tightly with plastic wrap or store it in an airtight container. It’ll keep in the fridge for up to three days. Just remember to let it sit at room temperature for a bit before serving; that way, the frosting stays nice and creamy.
Why did my Butterfinger Cake turn out dry?
A dry cake can happen if you overbake it or skimped on moisture-rich ingredients. Make sure you’re using whole milk and following the baking time closely—check for doneness with a toothpick after 30 minutes. If it comes out clean, it’s done! Trust me, a little extra care goes a long way here (plus, nobody wants a cake that feels like sandpaper).
What’s the best way to store this recipe?
You can store this dish in the fridge for about three days—just make sure it’s covered well to prevent drying out. If you need to keep it longer, slice and freeze individual pieces; they’ll hold up pretty well for about a month. Just let them thaw at room temperature when you’re ready to enjoy again—it’s like having your own little treat stash!
Can I use crunchy peanut butter in this recipe?
I wouldn’t recommend using crunchy peanut butter here; creamy is key for that smooth frosting texture we all love. If you want some crunch, sprinkle chopped Butterfinger bars on top instead! The contrast between that melty-gooey frosting and the candy adds just the right touch without compromising texture. So stick with creamy, and you’ll be golden!
Final Thoughts on Butterfinger Cake
If you’re looking for something that packs a punch in the flavor department, this Butterfinger Cake is where it’s at. The combination of creamy peanut butter frosting with those crunchy, sticky-sweet Butterfinger pieces on top? Total crowd-pleaser. Plus, it comes together without too much fuss — you’ll have dessert ready before you know it. Seriously, if you’ve been putting this off, tonight’s the night. Let me know how yours turned out in the comments!
Butterfinger Cake
Ingredients
Method
- Preheat your oven to 350°F (175°C). Grease and flour a 9x13 inch baking pan.
- In a large mixing bowl, combine flour, sugar, cocoa powder, baking powder, baking soda, and salt.
- Add eggs, milk, vegetable oil, and vanilla extract to the dry ingredients. Mix until well combined.
- Pour the batter into the prepared baking pan and smooth the top.
- Bake in the preheated oven for 30 minutes, or until a toothpick inserted into the center comes out clean.
- In a medium bowl, beat together creamy peanut butter and softened butter until smooth and creamy.
- Gradually add powdered sugar and heavy cream, mixing until the frosting is light and fluffy.
- Once the cake has cooled completely, spread the peanut butter frosting evenly over the top.
- Sprinkle the crushed Butterfinger candy bars over the frosting.
- Slice and serve. Enjoy your Butterfinger Cake!